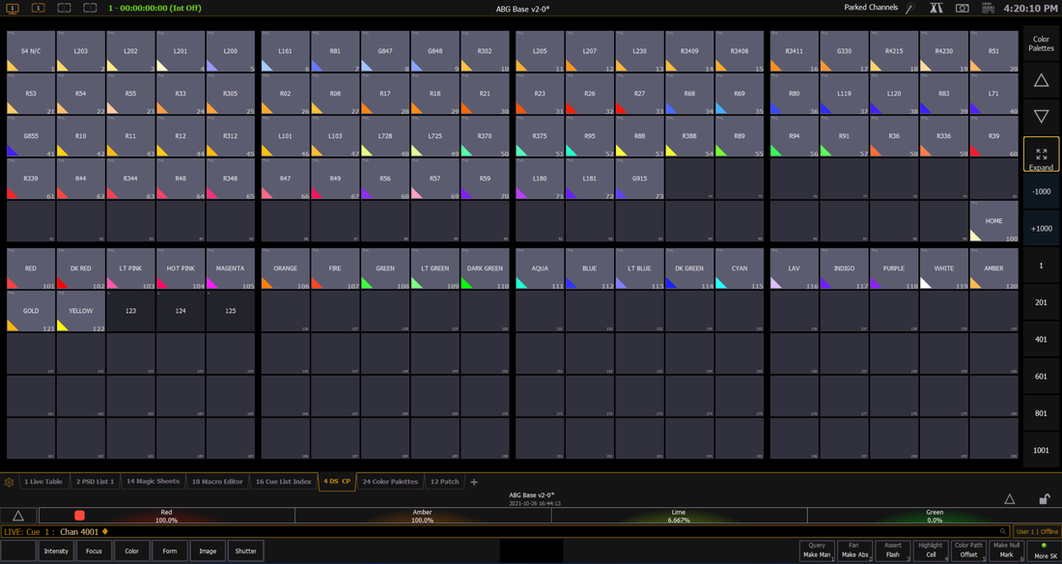
 In addition to programming in ETC EOS, I sometimes program on a HOG 4. One of the features that I really enjoy on the HOG is the ability to automatically create color palettes for fixtures. I wanted this ability for my base EOS showfile, so when I walk into a venue and there's a fixture I've haven't worked with before I can easily integrate it into my effects and presets that reference color palettes. I keep all of my color palette data in unpatched channels in the 4000 range and reference everything by type. My approach for creating the palettes is to create a macro for each palette . It takes awhile to set up but has saved me lots of time when on site at a job. I've linked the macros all together so you only need to execute the first one. The macro uses select last to identify what channel or groups(s) to apply color info to so all I need to do is select the channels and run macro 4000. Here are the types of macros I've created: 1. A home color macro that captures what the home value for that specific fixture is. (Note: if you ever change the home preset of a fixture the palette won't reference that change after you've created the palette.) 2. Hue saturation palette macros for general colors like red, green, and magenta. 3. Gel color palette macros that reference the console gel color value.    After all your macros are created for each color you want it's really satisfying to see the colors populate in the direct selects! If some colors don't show up in real life exactly how you'd like then you can easily adjust the palette. This method is just meant to give you a fast starting point.
Let me know in the comments if you have any suggestions on how to do this better or if you'd like to hear about something else. I'm planning on doing a post soon on how I organize colors across files.
1 Comment
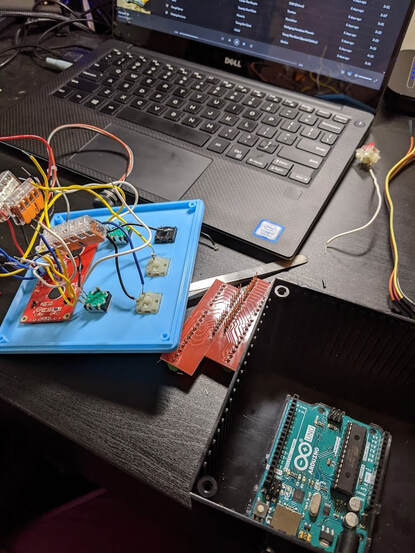
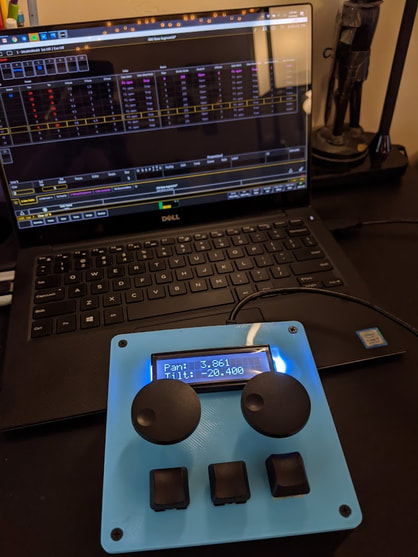
If your not familiar with ETC's lighthack kit project you can read about it here: community.etcconnect.com/etclabs/f/lighthack/23742/what-is-lighthack I did the project a while back and here are a few tips to make building it better. I bought the kit that ETC sells (link below) but you can make your own variation with your own code. Here are a few quick tips to make it a bit more robust and easier. shop.etcconnect.com/lighthack-box-1/ Tip #1 3d print or purchase a 3d printed lid. I tried what ETC suggested and drilling out the holes in the lid that didn't go well so I bought a 3d printed lid from TheatreWolf www.etsy.com/listing/806685082/etc-lighthack-3d-printed-box?show_sold_out_detail=1&ref=nla_listing_details Tip #2 I would recommend getting a screw shield for the Arduino so you don't have to worry about soldering to the Arduino or wires popping out. It also makes the control board easily interchangeable. www.amazon.com/Gikfun-Shield-Expansion-Arduino-EK7007/dp/B014SGTP20/
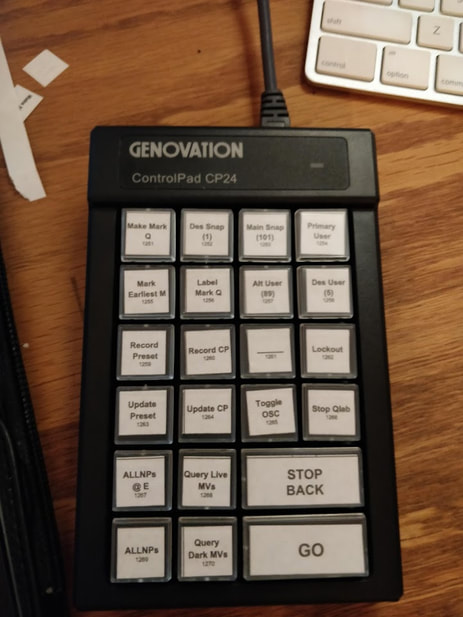
One of the biggest jobs of the programmer in theatre is to mark intelligent lights and to keep the tracking of them clean and organized. This post is all about what macros I use to help speed up the marking process, because time is valuable. Like many other things in EOS there are many methods to mark things. One of the options is using auto-mark. Auto-mark can be used to automatically mark your lights, It's a great tool if you don't have much time, although it can sometimes take time to work around it's limitations. Auto mark doesn't allow you to specify an exact cue for a light to mark in. I will generally only use auto mark if I have a rig with color changing LEDs as the only intelligent fixture. I the rig has scrollers or any moving lights it's best to stick with manually marking. The industry standard that I've encountered in theatre is to only mark lights in part 20 of a cue. Part 20 is the highest number part you can have in EOS. Marking in a different part than the base cue gives you the ability to easily view and change the timing of the mark. Now on to the macros I use! (NOTE: I do all of my clean up in blind so I make the macro as if I'm already in blind. I know some programmers that have their macros take them into blind.) 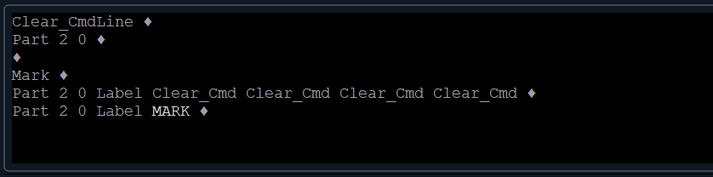 Make Part 20  Query Live Moves  Mark Earliest M  All non intensity parameters at enter cue only (This is good for cleaning up live moves of lights going out) I use a programmable key pad to fire my macros. Below are some images of the evolution of it. I'm always changing it to adapt to my needs. Let me know in the comments if you want to hear about more of the macros.
|